

Understanding Kubernetes: Developer's Guide
Using K8s to develop Resilient Microservices


Kubernetes is a cool word to have in your Architecture Document, and hot on your CV. On Premise or on the Cloud, everyone wants to have the workloads in Kubernetes. While we follow the herd, it is important to understand what goes into it. What are the patterns and anti-patterns when we work with Kubernetes. This blog gives you all that you need, to understand and use Kubernetes.
Why Kubernetes
The core concepts
Minikube
Kubernetes Objects
Patterns & Antipatterns
Kubernetes in Cloud - EKS
Kubectl
MicroK8s
Interview Questions
Why Kubernetes?
Why?$%^#
That was my first thought, when I read about Kubernetes. Why do we need such complex systems? A simple java -jar is enough to run my microservice on the Linux server! I write good code. I handle all exceptions. I am sure nothing will fail. Even if it fails, I can write a simple bash script that takes care of restarting my service. My code can take care of horizontal scaling and failovers. I have a good firewall, and logging framework. And all this requires just a few lines of additional code - packed into a simple Jar that I include in all my microservices. Why should I waste precious compute and time and resources on such crazy stuff? Frankly, I still feel the same.
A lot of systems really don't need Kubernetes. But some systems do. For mission critical enterprise scale applications, where downtime can be costly, we need more than just an inhouse library - to take care of the service orchestration. We tend to underestimate the level of hardening and resilience that we need for such applications. And it is not possible or worth the effort if we go out reinventing the wheel for every application in the world. We need a system that is tested and hardened by developers all over the globe. And that is Kubernetes.
Yes, Kubernetes gives a lot more than the above, and that may seem wasteful to some. But we can also look at it as an opportunity to improve and scale our services beyond what we need today. This requires a minor effort in learning something new - with great returns in form of scalability and stability.
Kubernetes started as the hefty multi node application. But its popularity and usability have led to several variants like MiniKube (for a single PC) and MicroK8s (IoT). Kubernetes is not restricted to the Peta scale applications. It has found its way into various other platforms and architectures.
Core Concepts
A simple Google search will show us - "Kubernetes is a portable, extensible, open-source container orchestration tool". That sounds cool - doesn't it? We just cleared the first interview question. Let's now look at the rest.
In Simple Words
Kubernetes was designed to enable extreme availability, scalability, performance and disaster recovery. This is achieved by an ecosystem built around a multi node architecture. High availability and disaster recovery demands that the application spreads across multiple servers (or virtual machines in the cloud).
Each server is called a Node. We have Master Nodes and Worker Nodes. As the names suggest, the master takes care of the orchestration and the worker is the one that really handles the work. Kubernetes does not demand this distinction. We can have the master node components running on the worker nodes. But it is a good practice to separate them.
Obviously, Master Node is the core component, and we cannot rely on just one master node. We need at least two. We can have several worker nodes that bear the container workloads. One node has several containers running in Pods.
The master node, also called the Control Plane, contains several components that take care of the orchestration. The worker node connects with the master and takes care of the individual pods through minimal applications running on the worker node - Kubelet and K-proxy. The master, on the other hand has an elaborate set of components that handle the orchestration.
Kubernetes Components
Let's look at each of these components in some detail. But before I rattle off the names of these components, it makes sense to think of how we would implement an application like Kubernetes. What components would we add to it?
We saw above that it has a Control Pane in Master Nodes and a chunk of Worker Nodes. The most important component of such an application should be a scheduler - that takes care of allocating the right worker node for any container to run. This scheduler should have a way to monitor the state of each of the worker nodes - so that it can take an intelligent decision about the scheduling. The container itself should be covered by an entity that monitors its progress and raises an alarm if it is not healthy.
We need a way to store the state of the entire cluster - so that we can manage a disaster recovery. Similarly, each container should have a way to store any persistent data.
And above all, we need a way to allow the rest of the world to connect to the services in the cluster. It is good to have a neat UI that helps developers access the internals, an API for other applications. And finally a CLI for the nerds who enjoy complexity.
And all this should be implemented with extreme abstraction, so that no component is locked into the other. Let's now look at how Kubernetes implements each of these.
Pods
On the lowest level, we have containers (mostly docker) that can run our microservices. If you are reading this, obviously you know what is docker or container, so I won't go too deep into it. If not, you can just think of it is a well packaged microservice that can run independently.
A Kubernetes Pod is the sugar coating on this container - that takes care of the container running on one of the worker nodes in the cluster. It monitors the container, and if it fails, the Pod takes care of restarting it. The Pod extracts the logs generated by the container and pushes them into the cluster logs. It reports the health of the container to the cluster - thus acting as a bridge between Kubernetes and the container itself. Also a Pod can have multiple containers - if it is necessary to couple them tightly.
Each Pod has an independent IP address in the Cluster Internal IP Space. This allows communication among microservices in the cluster
Service
Pods have individual IP addresses - to allow Pods to communicate among each other. But then, we have a problem. Pods are not permanent. They can be terminated, scaled or they can die because of various reasons - which are beyond our control. Kubernetes takes care of replacing them appropriately. But when a new pod is created, it gets another IP address. Also, as we scale horizontally, we can have multiple Pods for the same microservice.
If one microservice invokes another, we cannot do so using IP addresses - that will add the complexity to the caller. The caller will have to take care of identifying the current IP address of the Pod, and if we have multiple pods for the microservice, it will have to take care of choosing one of them. This is absurd!
To avoid this problem, we need an entity that envelopes all the pods of a given microservice, and provides a consistent URL for invoking that service. Internally, it takes care of mapping the request to the right Pod, considering the various factors like load balancing, scaling, etc.
Deployment
As we saw, Pods can be replaced, scaled, terminated and created on the fly. A Deployment can be considered as a template that defines how a new Pod can be created for the given Service. It contains all the details about the docker image, application properties, the replica count, resources required for the Pod. It contains the details of how the Pod should communicate with the outside world... and all that the Kubernetes requires in order to create the Pod, and ensure the right number of pods.
Kubelet
All this happens on the Worker Node, under the direction of the Control Panel running on the Master Node. Naturally we need a way to connect the Worker with the Master Some application that monitors activities on the Worker Node and reports the status to the Master; and takes commands from the Master, to implement on the Worker Node. This is the Kubelet.
This has very little intelligence of its own. I just takes care of reporting and implementing the instructions. But it track status of the node in detail - the CPU, memory utilization of the worker nodes, along with the status of each pod running on the node. It takes care of periodically running the health check on each pod, to make sure it is active.
The Control Plane can instruct it to terminate a given pod or create new ones. The Kubelet takes care of executing these instructions.
Kubeproxy
Some of these microservices may expose an external API, or access some external API's. This is enabled by the KubeProxy. As the name suggests, it acts as a simple proxy server on the node.
API Server
This is the facade of the Kubernetes cluster for rest of the world . It is the entry point for all API calls. Several clients communicate with this - Dashboard UI, API for automating technologies, CLI tool. It is based on the kurbe-apiserver. Note this is the entry for the Kubernetes cluster itself. The communication of individual pods - with the outside world, does not go through this. It goes through the KubeProxy on the individual worker nodes.
Scheduler
The scheduler is responsible for scheduling the pods on worker nodes. If an existing pod dies, we need to remove it and create a new one. Similarly, if we need to scale up a deployment, we need to create new pods. Such pods should find a new place in the cluster. They should be assigned to a particular worker node.
When choosing a worker node, it has to take care of several factors. We cannot have all pods of the a deployment on the same node. That defeats the purpose of having a cluster of multiple worker nodes. The pods should be spread out such that if any worker node crashes, rest of the cluster should be able to continue the work. Along with this, it has to take care that the load is equally distributed among the different worker nodes.
To do this, it should have all that it takes to make a smart decision about this allocation. It should know the status of each pod on each worker node. It should know the load on each node. For all this, it should be connected to the Kubelets running on each worker node.
Controller manager
As the name suggests, this is the controller managing the entire cluster. It keeps track of all that happens in the cluster. The Kubelets report the status of each pod to this controller manager. If a pod dies, the status is reported to the controller. If necessary (it is possible that the pod was explicitly terminated for scale down - in that case it is not necessary to replace), the Controller triggers the scheduler to create a replacement.
etcd
This is the current state of the cluster. (The cluster from the Kubernetes admin point of view - not the state of the individual microservices). The etcd holds details about the current system and what it should be. The other components refer to it for identifying the next action.
It is very useful in case of a disaster recovery - whereby the controller manager in the new cluster can just pick the etcd to recreate the new cluster. But there is a caveat. Kubernetes does not take care of persisting the etcd on disk. If we want to use if for disaster recovery, the admin has to take care of doing that.
Ingress
The Kubernetes cluster is never a standalone entity. It has active connections with the rest of the world. It invokes external API's and also exports API's for rest of the world. The Kubernetes external service take care of providing IP addresses. But that is not the right way. A good system should not export IP Addresses. Instead, it should export a URL. This is implemented using the Ingress.
Ingress has an elaborate mechanism to export specific URL for each service. We can provide the mapping of externally exported URL to the one expected by the API within the service.
ConfigMap
We all like to extract the constants out of the application code to a Properties file. Kubernetes provides a neat framework for handling such property files. In fact, Kubernetes takes this a few steps ahead - letting us configure the configuration files.
The property files are provided in two sets. The Config Maps and the Playbook. The config map can be considered a template of the property files. The actual values come from the playbooks. Typically, we have one config maps for each service, with multiple playbooks - to take care of multiple environments and versions. Thus we can have the same application code referring to different property files - that are generated at the time of deployment.
Secret
Many developers do it, but we should never store passwords in the property files. They should not be accessible to human eyes. Kubernetes provides the concept of Secrets to handle this. We can save encrypted information here, that is decrypted only on deployment - so that it is always safe and secure.
Volume
This is an important concept. In Kubernetes, the pods and containers are ephemeral. They can be killed or restarted at any time. Naturally, they should be stateless. Microservice architecture principles recommend that the services should be stateless as far as possible. But there are some services that need a state. For example, a database has to save data to the disk. This data cannot be forgotten on a container or pod reset. Kubernetes provides the concept of Volumes for this persistence. In the spirit of Kubernetes, this is extremely configurable and abstracted - so that it can tolerate changes.
It works through Storage Class(SC), Persistent Volume (PV) and Persistent Volume Claim(PVC). SC, as the name suggests is specific to a class of storage. It could be an AWS EBS or a local Disk or a remote server on premise. This configuration is defined and restricted to the SC - by the admin.
The developers configure the deployment along with a claim for this persistent volume. This PVC claims a volume of storage out of the requested Storage Class. Kubernetes takes care of allocating this in form of a PV - when the new Pod is started.
Namespace
Small teams and small applications can live without a namespace (on the default namespace). But, in an enterprise scale application, we have hundreds of microservices - deployed on the same Kubernetes Cluster. We have several teams working in parallel on these microservices.
Kubernetes has too many entities. And it is important to ensure that the names of these entities do not clash. We cannot have a consensus board allocating names to each developer, on demand. that would be crazy. It is much better to divide the enterprise into smaller applications - with a namespace for each. That isolates the teams and prevents confusion.
Namespace is not a security measure. But it just simplifies the discipline.
Helm
Helm is not a part of the Kubernetes, out of the box. But it is popularly used with Kubernetes. All the concepts that we saw above and actual entities in a Kubernetes cluster. And everything in Kubernetes, is essentially a YAML file - nothing more. We just create YAML files, with the appropriate syntax and required information. Then Kubernetes puts life in those YAML files, to make an entire enterprise scale application with extreme capabilities.
As one might imagine, we have a flood of YAML files. Every single microservice in there has at least a dozen of these YAML files, few dozens at times. This is naturally a daunting task for any admin. It gets frustrating when we have similar deployment for most of the services through the enterprise, and we have some services have a similar deployment across the globe (eg, the ELK stack)
Helm provides a simple solution to this - in form of Helm Charts - that can systematically organize the different YAML files into Helm Charts.
Minikube
We can think of Minikube as a smaller toy version of Kubernetes - that we can install on our local machine. This is useful for validating our deployments and also very useful for learning and perfecting our skills.
Let us start with installing Minikube. I have a sincere request at this point. I have nothing (everything) against Microsoft. Windows is (not) a great Operating System. If you are serious about DevOps, better grow out of it. Switch to Ubuntu. Or you can just create a small EC2 instance for learning. (Remember to terminate the EC2 once you are done).
Install
$ curl -LO https://storage.googleapis.com/minikube/releases/latest/minikube-linux-amd64
  % Total    % Received % Xferd  Average Speed   Time    Time     Time  Current
                                 Dload  Upload   Total   Spent    Left  Speed
100 65.2M  100 65.2M    0     0   149M      0 --:--:-- --:--:-- --:--:--  148M

$ sudo install minikube-linux-amd64 /usr/local/bin/minikube
That's quick. The Minikube is now deployed on Ubuntu.
Start
Now, we go ahead and start the cluster. That is equally simple.
$ minikube start
* minikube v1.23.0 on Ubuntu 20.04
* Automatically selected the docker driver. Other choices: none, ssh

* Starting control plane node minikube in cluster minikube
* Pulling base image ...
* Downloading Kubernetes v1.22.1 preload ...
    > preloaded-images-k8s-v12-v1...: 515.04 MiB / 515.04 MiB  100.00% 138.61 M
    > gcr.io/k8s-minikube/kicbase: 355.82 MiB / 355.82 MiB  100.00% 51.85 MiB p
* Creating docker container (CPUs=2, Memory=1949MB) ...
* Preparing Kubernetes v1.22.1 on Docker 20.10.8 ...
  - Generating certificates and keys ...
  - Booting up control plane ...
  - Configuring RBAC rules ...
* Verifying Kubernetes components...
  - Using image gcr.io/k8s-minikube/storage-provisioner:v5
* Enabled addons: default-storageclass, storage-provisioner
* kubectl not found. If you need it, try: 'minikube kubectl -- get pods -A'
* Done! kubectl is now configured to use "minikube" cluster and "default" namespace by default
There! Minikube cluster is up and ready.
If it cribs about the available memory, it will also suggest a way to restrict the memory usage. We can use the suggested options in the start command and try again.
We can also alter the allocated memory configuration directly
$ minikube config set memory 16384
! These changes will take effect upon a minikube delete and then a minikube start
Kubectl
We can connect to this cluster using kubectl. Let's try this by querying for any pods running.
$ minikube kubectl -- get po -A

NAMESPACE     NAME                               READY   STATUS    RESTARTS        AGE
kube-system   coredns-78fcd69978-wf5wx           1/1     Running   0               3m57s
kube-system   etcd-minikube                      1/1     Running   0               4m8s
kube-system   kube-apiserver-minikube            1/1     Running   0               4m11s
kube-system   kube-controller-manager-minikube   1/1     Running   0               4m8s
kube-system   kube-proxy-l8j4q                   1/1     Running   0               3m57s
kube-system   kube-scheduler-minikube            1/1     Running   0               4m11s
kube-system   storage-provisioner                1/1     Running   1 (3m25s ago)   4m6s
(Minikube can fetch the right version of kubectl for us. For this we use the minikube kubectl command. This will also install the kubectl - if it is not already installed. )
As we discussed in part 2/10, these are the pods corresponding to the controller plane.
With this installation, we can do most of what we can do with a real Kubernetes cluster. So it presents a good utility for development and practice.
Cleanup
Finally, we can cleanup the stuff before we go. We can stop the cluster
$ minikube stop
* Stopping node "minikube"  ...
* Powering off "minikube" via SSH ...
* 1 nodes stopped.
ubuntu@ip-172-31-1-122:~$
And then delete it all.
$ minikube delete --all
* Deleting "minikube" in docker ...
* Removing /home/ubuntu/.minikube/machines/minikube ...
* Removed all traces of the "minikube" cluster.
* Successfully deleted all profiles
Kubernetes Objects
Any objects in the Kubernetes cluster is a simple YAML. We describe the object to Kubernetes through such YAML files, and then it makes every attempt to live up to that specification. Being a super versatile tool, we can expect it to have a very complex configuration - and it is.
But it is a lot simpler that what it could have been. The configuration is intuitively broken into components that are a lot easier to manage. If we can understand this structure, and the meaning of each component, the configuration as a whole should not be difficult at all.
The Kubernetes documentation is very crisp and it is quite easy to search for what we need. So there is no need to memorize any syntax. Instead, let's have a look at a simple MySQL deployment that can give us a basic idea about the YAML structure.
Persistent Volume
Database deployments need a persistent volume that can hold the data beyond the life of the pod. Such persistent volume should be configured using a YAML similar to this. The significance of individual fields is quite intuitive.
This configuration defines a persistent volume based out of the local, manual storage class. It allocates a bulk of 20GB and allocates
kind: PersistentVolume
apiVersion: v1
metadata:
  name: mysql-pv-volume
  labels:
    type: local
spec:
  storageClassName: manual
  capacity:
    storage: 20Gi
  accessModes:
    - ReadWriteOnce
  hostPath:
    path: "/mnt/data"
Persistent Volume Claim
Persistent Volume is offered by the Kubernetes cluster. The deployment claims one for itself, using the persistent volume claim. Below is a sample YAML for a PVC
apiVersion: v1
kind: PersistentVolumeClaim
metadata:
  name: mysql-pv-claim
spec:
  storageClassName: manual
  accessModes:
    - ReadWriteOnce
  resources:
    requests:
      storage: 20Gi
Service
The service definition is pretty simple.
apiVersion: v1
kind: Service
metadata:
  name: mysql
spec:
  ports:
  - port: 3306
  selector:
    app: mysql
  clusterIP: None
Deployment
This provides the template for generating individual pods, along with the specific details of configuration. It refers to the PV, PVC and also the secrets to build the pod out of the specified containers.
apiVersion: apps/v1
kind: Deployment
metadata:
  name: mysql
spec:
  selector:
    matchLabels:
      app: mysql
  strategy:
    type: Recreate
  template:
    metadata:
      labels:
        app: mysql
    spec:
      containers:
      - image: mysql:5.6
        name: mysql
        env:
          # Use secret in real usage
        - name: MYSQL_ROOT_PASSWORD
          value: password
        ports:
        - containerPort: 3306
          name: mysql
        volumeMounts:
        - name: mysql-persistent-storage
          mountPath: /var/lib/mysql
      volumes:
      - name: mysql-persistent-storage
        persistentVolumeClaim:
          claimName: mysql-pv-claim
Patterns
Kubernetes pattern is a vast topic. Too vast to be covered in this small blog. Bit I can refer a wonderful book that gives a very good detail on this topic. github.com/solegaonkar/KubernetesPatterns
It provides a elaborate understanding of the various patterns including
Foundational Patterns
Behavioral Patterns
Structural Patterns
Configuration Patterns
Advanced Patterns
Antipatterns
Powerful tools can be disasterous if not used correctly. Same goes with Kubernetes. Just using Kubernetes in the application does not make it the perfect resilient system. We should know how to use it. Let us look at some of the anti patterns that make our lives miserable.
Latest Tag
Some developers love to be on the edge. They carry the same to the deployments. When we create docker containers, we should provide a discrete version number in the Dockerfile. Else we never know when some upgrade some day can kill our cluster.
Configuration inside container
I have made this mistake so I know this very well. Old class developers feel content when they pull out the constants into a Constants.java file. That is a very good practice. But not enough. Every configuration has to be pulled out into a property file - and then into the configuration. Anything related to the environment has to be pulled further into the playbook.
Overusing Kubernetes Features
Kubernetes is good for container orchestration. Let's restrict it there. Avoid using its features, or depending upon its features for business logic. The business logic should be restricted to our application code - in the container.
Using kubectl edit/patch
These are great features to be used in the lab. They should not be used in a real application. Any deployment has to go through the right process of updating the deployment.yml - else it is very easy to loose control of what is deployed and we have no idea of what is working and what is not.
Missing the Memory/CPU limits
It is very important to specify the Memory/CPU limits in our deployments. That we we localize failures. We should have a good understanding of our application's requirements and that can help us specify these limits. If one service goes off track, it should not hamper the rest of the application.
Overusing Kubernetes
Kubernetes is a great tool for some purpose. It is not a single fix-all solution to all problems on earth. Some services should live outside the Kubernetes, and we should not try to push them into the cluster. Databases, for example have the right to live outside the cluster.
Kubernetes in Cloud
One can easily guess that managing a Kubernetes cluster is a daunting task. It requires a huge number of meticulous steps, and can drive us crazy if we miss anything in the detailed process. It is best to have someone else do it for us.
Also, High performance and Resilient cannot be on premise. So it makes a lot of sense to pick up one of the readymade Kubernetes clusters on the cloud. And what can be better than AWS - Elastic Kubernetes Service.
EKS
An Amazon ECS cluster is a regional grouping of one or more container instances on which you can run task requests. Each account receives a default cluster the first time you use the Amazon ECS service. Clusters may contain more than one Amazon EC2 instance type.
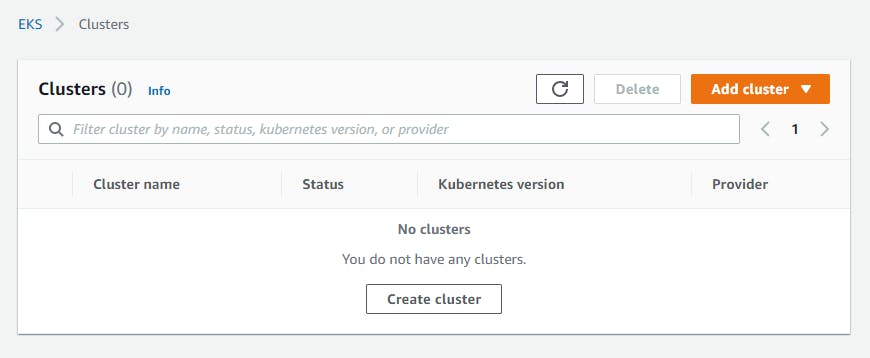
To start, navigate to the EKS page on the AWS Console. Then click on Create Cluster
Next, we just provide the basic details to create the new cluster.
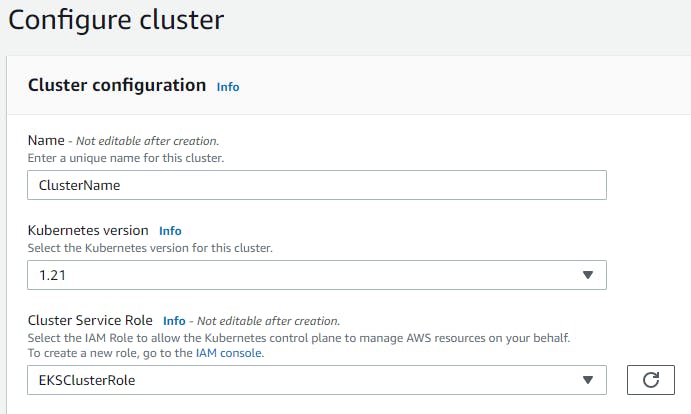
Note that the role should be created in IAM. It is just the basic role with the required policy for the EKS Cluster.
Follow the defaults in the rest of the pages, to create the new cluster. And voila! The cluster is ready. It has simple UI to add nodes and other configuration. Now we don't need to go into the details of installing and configuring. Everything is available on the click of the button.
All we have to do now is configure the individual deployments on the EKS. Rest is managed for us. Azure, GCP and Digital Ocean have very similar options for managed Kubernetes hosting.
Kubectl
As we saw before, kubectl is a simple command line interface to the Kubernetes Cluster. It is simple but very powerful.
kubectl commands
Kubernetes comes with a simple command line interface - the kubectl. It is very powerful and we can do almost anything with the cluster.
The kubectl syntax is simple.
kubectl <action> <optional parameters> <target> <optional parameters>
The action could be get, describe, create, delete, edit, apply, exec.. The target could be the the pod, deployment, service, container, ...
Get
We can use the kubectl get to fetch the list of nodes, pods, etc. It just pulls a list and shows in the STDOUT.
kubectl get nodes
kubectl get pod
kubectl get services
kubectl get deployment
kubectl get replicaset
Edit
It is highly discouraged. But if required, we can directly edit the deployment YAML on the cluster. But it is not advisable. If we do this, we will soon get into an inconsistency where we don't know what is deployed. It is best to update the YAML file in the version control and then push it on the cluster.
kubectl edit deployment nginx-depl
Similarly we can directly create a new deployment on command line.
kubectl create deployment nginx-depl --image=nginx
This is the right way to do it.
kubectl apply -f nginx-deployment.yaml
Logs
We can print out the logs of the running pod.
kubectl logs {pod-name}
Exec
We can also peep into the pod. Just get into its linux shell and see how the world appears in there. This is very useful for debugging.
kubectl exec -it {pod-name} -- bin/bash
Cheatsheet
A collection of useful kubectl commands
Common Commands
| Name | Command |
| Run curl test temporarily | kubectl run --generator=run-pod/v1 --rm mytest --image=yauritux/busybox-curl -it |
| Run wget test temporarily | kubectl run --generator=run-pod/v1 --rm mytest --image=busybox -it wget |
| Run nginx deployment with 2 replicas | kubectl run my-nginx --image=nginx --replicas=2 --port=80 |
| Run nginx pod and expose it | kubectl run my-nginx --restart=Never --image=nginx --port=80 --expose |
| Run nginx deployment and expose it | kubectl run my-nginx --image=nginx --port=80 --expose |
| List authenticated contexts | kubectl config get-contexts=, =~/.kube/config |
| Set namespace preference | kubectl config set-context <context_name> --namespace=<ns_name> |
| List pods with nodes info | kubectl get pod -o wide |
| List everything | kubectl get all --all-namespaces |
| Get all services | kubectl get service --all-namespaces |
| Get all deployments | kubectl get deployments --all-namespaces |
| Show nodes with labels | kubectl get nodes --show-labels |
| Get resources with json output | kubectl get pods --all-namespaces -o json |
| Validate yaml file with dry run | kubectl create --dry-run --validate -f pod-dummy.yaml |
| Start a temporary pod for testing | kubectl run --rm -i -t --image=alpine test-$RANDOM -- sh |
| kubectl run shell command | kubectl exec -it mytest -- ls -l /etc/hosts |
| Get system conf via configmap | kubectl -n kube-system get cm kubeadm-config -o yaml |
| Get deployment yaml | kubectl -n denny-websites get deployment mysql -o yaml |
| Explain resource | kubectl explain pods=, =kubectl explain svc |
| Watch pods | kubectl get pods -n wordpress --watch |
| Query healthcheck endpoint | curl -L http://127.0.0.1:10250/healthz |
| Open a bash terminal in a pod | kubectl exec -it storage sh |
| Check pod environment variables | kubectl exec redis-master-ft9ex env |
| Enable kubectl shell autocompletion | echo "source <(kubectl completion bash)" >>~/.bashrc, and reload |
| Use minikube dockerd in your laptop | eval $(minikube docker-env), No need to push docker hub any more |
| Kubectl apply a folder of yaml files | kubectl apply -R -f . |
| Get services sorted by name | kubectl get services --sort-by=.metadata.name |
| Get pods sorted by restart count | kubectl get pods --sort-by='.status.containerStatuses[0].restartCount' |
| List pods and images | kubectl get pods -o='custom-columns=PODS:.metadata.name,Images:.spec.containers[*].image' |
Check Performance
| Name | Command |
| Get node resource usage | kubectl top node |
| Get pod resource usage | kubectl top pod |
| Get resource usage for a given pod | kubectl top <podname> --containers |
| List resource utilization for all containers | kubectl top pod --all-namespaces --containers=true |
Resources Deletion
| Name | Command |
| Delete pod | kubectl delete pod/<pod-name> -n <my-namespace> |
| Delete pod by force | kubectl delete pod/<pod-name> --grace-period=0 --force |
| Delete pods by labels | kubectl delete pod -l env=test |
| Delete deployments by labels | kubectl delete deployment -l app=wordpress |
| Delete all resources filtered by labels | kubectl delete pods,services -l name=myLabel |
| Delete resources under a namespace | kubectl -n my-ns delete po,svc --all |
| Delete persist volumes by labels | kubectl delete pvc -l app=wordpress |
| Delete state fulset only (not pods) | kubectl delete sts/<stateful_set_name> --cascade=false |
Log & Conf Files
| Name | Comment |
| Config folder | /etc/kubernetes/ |
| Certificate files | /etc/kubernetes/pki/ |
| Credentials to API server | /etc/kubernetes/kubelet.conf |
| Superuser credentials | /etc/kubernetes/admin.conf |
| kubectl config file | ~/.kube/config |
| Kubernetes working dir | /var/lib/kubelet/ |
| Docker working dir | /var/lib/docker/, /var/log/containers/ |
| Etcd working dir | /var/lib/etcd/ |
| Network cni | /etc/cni/net.d/ |
| Log files | /var/log/pods/ |
| log in worker node | /var/log/kubelet.log, /var/log/kube-proxy.log |
| log in master node | kube-apiserver.log, kube-scheduler.log, kube-controller-manager.log |
| Env | /etc/systemd/system/kubelet.service.d/10-kubeadm.conf |
| Env | export KUBECONFIG=/etc/kubernetes/admin.conf |
Pod
| Name | Command |
| List all pods | kubectl get pods |
| List pods for all namespace | kubectl get pods -all-namespaces |
| List all critical pods | kubectl get -n kube-system pods -a |
| List pods with more info | kubectl get pod -o wide, kubectl get pod/<pod-name> -o yaml |
| Get pod info | kubectl describe pod/srv-mysql-server |
| List all pods with labels | kubectl get pods --show-labels |
| List running pods | kubectl get pods --field-selector=status.phase=Running |
| Get Pod initContainer status | kubectl get pod --template '{{.status.initContainerStatuses}}' <pod-name> |
| kubectl run command | kubectl exec -it -n "$ns" "$podname" -- sh -c "echo $msg >>/dev/err.log" |
| Watch pods | kubectl get pods -n wordpress --watch |
| Get pod by selector | kubectl get pods --selector="app=syslog" -o jsonpath='{.items[*].metadata.name}' |
| List pods and images | kubectl get pods -o='custom-columns=PODS:.metadata.name,Images:.spec.containers[*].image' |
| List pods and containers | kubectl get pods -o='custom-columns=PODS:.metadata.name,CONTAINERS:.spec.containers[*].name' |
Label & Annotation
| Name | Command |
| Filter pods by label | kubectl get pods -l owner=denny |
| Manually add label to a pod | kubectl label pods dummy-input owner=denny |
| Remove label | kubectl label pods dummy-input owner- |
| Manually add annotation to a pod | kubectl annotate pods dummy-input my-url=https://dennyzhang.com |
Deployment & Scale
| Name | Command |
| Scale out | kubectl scale --replicas=3 deployment/nginx-app |
| online rolling upgrade | kubectl rollout app-v1 app-v2 --image=img:v2 |
| Roll backup | kubectl rollout app-v1 app-v2 --rollback |
| List rollout | kubectl get rs |
| Check update status | kubectl rollout status deployment/nginx-app |
| Check update history | kubectl rollout history deployment/nginx-app |
| Pause/Resume | kubectl rollout pause deployment/nginx-deployment, resume |
| Rollback to previous version | kubectl rollout undo deployment/nginx-deployment |
Quota & Limits & Resource
| Name | Command |
| List Resource Quota | kubectl get resourcequota |
| List Limit Range | kubectl get limitrange |
| Customize resource definition | kubectl set resources deployment nginx -c=nginx --limits=cpu=200m |
| Customize resource definition | kubectl set resources deployment nginx -c=nginx --limits=memory=512Mi |
Service
| Name | Command |
| List all services | kubectl get services |
| List service endpoints | kubectl get endpoints |
| Get service detail | kubectl get service nginx-service -o yaml |
| Get service cluster ip | kubectl get service nginx-service -o go-template='{{.spec.clusterIP}}' |
| Get service cluster port | kubectl get service nginx-service -o go-template='{{(index .spec.ports 0).port}}' |
| Expose deployment as lb service | kubectl expose deployment/my-app --type=LoadBalancer --name=my-service |
| Expose service as lb service | kubectl expose service/wordpress-1-svc --type=LoadBalancer --name=ns1 |
Secrets
| Name | Command |
| List secrets | kubectl get secrets --all-namespaces |
| Generate secret | echo -n 'mypasswd', then redirect to base64 --decode |
| Get secret | kubectl get secret denny-cluster-kubeconfig |
| Get a specific field of a secret | kubectl get secret denny-cluster-kubeconfig -o jsonpath="{.data.value}" |
| Create secret from cfg file | kubectl create secret generic db-user-pass --from-file=./username.txt |
StatefulSet
| Name | Command |
| List statefulset | kubectl get sts |
| Delete statefulset only (not pods) | kubectl delete sts/<stateful_set_name> --cascade=false |
| Scale statefulset | kubectl scale sts/<stateful_set_name> --replicas=5 |
Volumes & Volume Claims
| Name | Command |
| List storage class | kubectl get storageclass |
| Check the mounted volumes | kubectl exec storage ls /data |
| Check persist volume | kubectl describe pv/pv0001 |
| Copy local file to pod | kubectl cp /tmp/my <some-namespace>/<some-pod>:/tmp/server |
| Copy pod file to local | kubectl cp <some-namespace>/<some-pod>:/tmp/server /tmp/my |
Events & Metrics
| Name | Command |
| View all events | kubectl get events --all-namespaces |
| List Events sorted by timestamp | kubectl get events --sort-by=.metadata.creationTimestamp |
Node Maintenance
| Name | Command |
| Mark node as unschedulable | kubectl cordon $NODE_NAME |
| Mark node as schedulable | kubectl uncordon $NODE_NAME |
| Drain node in preparation for maintenance | kubectl drain $NODE_NAME |
Namespace & Security
| Name | Command |
| List authenticated contexts | kubectl config get-contexts=, =~/.kube/config |
| Set namespace preference | kubectl config set-context <context_name> --namespace=<ns_name> |
| Switch context | kubectl config use-context <context_name> |
| Load context from config file | kubectl get cs --kubeconfig kube_config.yml |
| Delete the specified context | kubectl config delete-context <context_name> |
| List all namespaces defined | kubectl get namespaces |
| List certificates | kubectl get csr |
| Check user privilege | kubectl --as=system:serviceaccount:ns-denny:test-privileged-sa -n ns-denny auth can-i use pods/list |
Network
| Name | Command |
| Temporarily add a port-forwarding | kubectl port-forward redis-134 6379:6379 |
| Add port-forwarding for deployment | kubectl port-forward deployment/redis-master 6379:6379 |
| Add port-forwarding for replicaset | kubectl port-forward rs/redis-master 6379:6379 |
| Add port-forwarding for service | kubectl port-forward svc/redis-master 6379:6379 |
| Get network policy | kubectl get NetworkPolicy |
Patch
| Name | Summary |
| Patch service to loadbalancer | kubectl patch svc $svc_name -p '{"spec": {"type": "LoadBalancer"}}' |
Extenstions
| Name | Summary |
| Enumerates the resource types available | kubectl api-resources |
| List api group | kubectl api-versions |
| List all CRD | kubectl get crd |
| List storageclass | kubectl get storageclass |
Components & Services
Services on Master Nodes
| Name | Summary |
| kube-apiserver | API gateway. Exposes the Kubernetes API from master nodes |
| etcd | reliable data store for all k8s cluster data |
| kube-scheduler | schedule pods to run on selected nodes |
| kube-controller-manager | Reconcile the states. node/replication/endpoints/token controller and service account, etc |
Services on Worker Nodes
| Name | Summary |
| kubelet | A node agent makes sure that containers are running in a pod |
| kube-proxy | Manage network connectivity to the containers. e.g, iptable, ipvs |
| Container Runtime | Kubernetes supported runtimes: dockerd, cri-o, runc and any OCI runtime-spec implementation. |
Addons: pods and services that implement cluster features
| Name | Summary |
| DNS | serves DNS records for Kubernetes services |
| Web UI | a general purpose, web-based UI for Kubernetes clusters |
| Container Resource Monitoring | collect, store and serve container metrics |
| Cluster-level Logging | save container logs to a central log store with search/browsing interface |
Tools
| Name | Summary |
| kubectl | the command line util to talk to k8s cluster |
| kubeadm | the command to bootstrap the cluster |
| kubefed | the command line to control a Kubernetes Cluster Federation |
More Resources
MicroK8s
There was once a time when Kubernetes meant heavy compute and large overheads on super power servers. Over the years, it has thinned itself to an extent that we have Kubernetes creeping into the IoT devices as well! Let's try installing it on our Raspberry Pi
For this, we need an Ubuntu desktop - windows is not enough. Microsoft fans who can't quit using Windows, can have Ubuntu installed into a Virtual Machines. We will need at least 2 Raspberry Pis (to make a cluster). I have used three in this example. And of course, we need a micro USB cable to connect each Pi. And also one microSD card per Pi of at least 8GB - flashed with an Ubuntu Server image
Installing MicroK8s
The actual installation process is not difficult. We just ssh into the devices individually, and follow these steps:
sudo vi /boot/firmware/cmdline.txt
This has a complex command line. We just add a few more options into it cgroup_enable=memory cgroup_memory=1
The full line on my Pi looks like this. It will vary based on the versions:
cgroup_enable=memory cgroup_memory=1 net.ifnames=0 dwc_otg.lpm_enable=0 console=ttyAMA0,115200 console=tty1 root=/dev/mmcblk0p2 rootfstype=ext4 elevator=deadline rootwait
Next, we reboot the device
sudo reboot
Once it is back, we ssh into it again and install the MicroK8s using the simple command
sudo snap install microk8s --classic
This also installs the command line utility - also called microk8s. A few simple commands to give the flavor:
# Start the cluster
microk8s.start

# Inspect status of services
microk8s.inspect

# Stop all Kubernetes services
microk8s.stop

# Enable addons - eg kubedns addon
microk8s.enable dns

# Get status of the cluster
microk8s.kubectl cluster-info
Master / Worker
Once we have the microk8s installed on each of them, we can connect them into a cluster. We have to choose one of them as the master and run the below command:
sudo microk8s.add-node
This declares the current one as master, and it will provide a connection string to invite other worker nodes. The connection string looks like this: <master_ip>:<port>/<token>
Next, we go to each (wannabe) child node and run this command on shell
microk8s.join <master_ip>:<port>/<token>
That should connect the master and workers together. In a few seconds, we can check the master node once again, to see the cluster
microk8s.kubectl get node
Utility
One might wonder what is the big deal in doing this? Why do we need a Kubernetes running on IoT devices? But it makes a lot of sense. A lot more than real servers. IoT devices are really fragile, and we can be sure that something will break somewhere. If we have a mission critical application running out there on the field, it is useful to have multiple devices covering each other - to make sure the application continues to run.
Interview Questions
We have covered most of the basic concepts. Time to brush up on some of the interview questions so that you are ready to ace that job!
What is kubernetes
The simplest of all. Someone who has read this blog so far, certainly knows this. But, let's note something that can be remembered easily "Kubernetes is an open-source container management tool that holds the responsibilities of container deployment, scaling & descaling of containers & load balancing. Being Google’s brainchild, it offers excellent community and works brilliantly with all the cloud providers. So, we can say that Kubernetes is not a containerization platform, but it is a multi-container management solution."
What is container orchestration
We said Kubernetes takes care of container orchestration. But what exactly is this container orchestration?
"Consider a scenario where you have 5-6 microservices for an application. Now, these microservices are put in individual containers, but won’t be able to communicate without container orchestration. So, as orchestration means the amalgamation of all instruments playing together in harmony in music, similarly container orchestration means all the services in individual containers working together to fulfill the needs of a single server."
What is Heapster?
Now some serious ones.. Heapster is a cluster-wide aggregator of data provided by Kubelet running on each node. This container management tool is supported natively on Kubernetes cluster and runs as a pod, just like any other pod in the cluster. So, it basically discovers all nodes in the cluster and queries usage information from the Kubernetes nodes in the cluster, via on-machine Kubernetes agent.
What are the components of Kubernetes Architecture?
The Kubernetes Architecture has mainly 2 components – the master node and the worker node. As you can see in the below diagram, the master and the worker nodes have many inbuilt components within them. The master node has the kube-controller-manager, kube-apiserver, kube-scheduler, etcd. Whereas the worker node has kubelet and kube-proxy running on each node.
What is Kube-Proxy
Kube-proxy can run on each and every node and can do simple TCP/UDP packet forwarding across backend network service. So basically, it is a network proxy that reflects the services as configured in Kubernetes API on each node. So, the Docker-linkable compatible environment variables provide the cluster IPs and ports which are opened by proxy.
What is Kube API Server?
The kube – apiserver follows the scale-out architecture and, is the front-end of the master node control panel. This exposes all the APIs of the Kubernetes Master node components and is responsible for establishing communication between Kubernetes Node and the Kubernetes master components.
What is Kube Scheduler?
The kube-scheduler is responsible for the distribution and management of workload on the worker nodes. So, it selects the most suitable node to run the unscheduled pod based on resource requirement and keeps a track of resource utilization. It makes sure that the workload is not scheduled on nodes that are already full.
What is Kubernetes Controller Manager?
Multiple controller processes run on the master node but are compiled together to run as a single process which is the Kubernetes Controller Manager. So, Controller Manager is a daemon that embeds controllers and does namespace creation and garbage collection. It owns the responsibility and communicates with the API server to manage the end-points.
What are the different types of controller managers?
The different types of controller manager running on the master node are :
Node Controller: Manages the status of node (creation, updation, deletion)
Replication Controller: Maintains the number of pods for every replication object
Token controller: Creates default accounts and API access tokens for new namespaces
Endpoints controller: Takes care of endpoint objects like pods and services
Route controller: It manages the traffic routes in the underlying cloud infrastructure
Volume controller: Manages the storage volume and interacts with the cloud provider to orchestrate volume
What is etcd?
Etcd is written in Go programming language and is a distributed key-value store used for coordinating distributed work. So, Etcd stores the configuration data of the Kubernetes cluster, representing the state of the cluster at any given point in time.
What are the different types of services in Kubernetes?
Cluster IP: Exposes the service on a cluster-internal IP. It makes the service reachable from within the cluster. This is the default service type
Node Port: This exposes the service on each node's IP at a static port. A cluster IP service, to which the node port service will route is automatically created
Load Balancer: It exposes the service externally using a cloud provided load balancer. The service to which an external load balancers will route is automatically created
External Name: This maps the service to the contents of the external name field by returning a CNAME record with its value.
Kubernetes Load Balancers
A load balancer is one of the most common and standard ways of exposing service. There are two types of load balancer used based on the working environment i.e. either the Internal Load Balancer or the External Load Balancer. The Internal Load Balancer automatically balances load and allocates the pods with the required configuration whereas the External Load Balancer directs the traffic from the external load to the backend pods.
What is Ingress network?
Ingress network is a collection of rules that acts as an entry point to the Kubernetes cluster. This allows inbound connections, which can be configured to give services externally through reachable URLs, load balance traffic, or by offering name-based virtual hosting. So, Ingress is an API object that manages external access to the services in a cluster, usually by HTTP and is the most powerful way of exposing service.
Config Map v/s Secrets
Config maps ideally stores application configuration in a plain text format whereas Secrets store sensitive data like password in an encrypted format. Both config maps and secrets can be used as volume and mounted inside a pod through a pod definition file.
Multi Container Pod Patterns
sidecar: A pod spec which runs the main container and a helper container that does some utility work, but that is not necessarily needed for the main container to work.
adapter: The adapter container will inspect the contents of the app's file, does some kind of restructuring and reformat it, and write the correctly formatted output to the location.
ambassador: It connects containers with the outside world. It is a proxy that allows other containers to connect to a port on localhost.
API Security in Kubernetes
Use the correct auth mode with API server authorization-mode=Node, RBAC Ensure all traffic is protected by TLS Use API authentication (smaller cluster may use certificates but larger multi-tenants may want an AD or some OIDC authentication).
Make kubeless protect its API via authorization-mode=Webhook. Make sure the kube-dashboard uses a restrictive RBAC role policy Monitor RBAC failures Remove default ServiceAccount permissions Filter egress to Cloud API metadata APIs Filter out all traffic coming into kube-system namespace except DNS.
A default deny policy on all inbound on all namespaces is good practice. You explicitly allow per deployment. Use a podsecurity policy to have container restrictions and protect the Node Keep kube at the latest version.
Worker Nodes:
Kubernetes Worker node is a machine where workloads get deployed. The workloads are in the form of containerised applications and because of that, every node in the cluster must run the container run time such as docker in order to run those workloads. You can have multiple masters mapped to multiple worker nodes or a single master having a single worker node. Also, the worker nodes are not gossiping or doing leader election or anything that would lead to odd-quantities. The role of the container run time is to start and managed containers. The kubelet is responsible for running the state of each node and it receives commands and works to do from the master. It also does the health check of the nodes and make sure they are healthy. Kubelet is also responsible for metric collectins of pods as well. The kube-proxy is a component that manages host subnetting and makes services available to other components.
Reload config map without pod restart
We need some way of triggering the reload. Ether do a check every minute or have a reload endpoint for an api or project the configmap as a volume, could use inotify to be aware of the change. Depends on how the configmap is consumed by the container. If env vars, then no. If a volume Mount, then the file is updated in the container ready to be consumed by the service but it needs to reload the file
The container does not restart. if the configmap is mounted as a volume it is updated dynamically. if it is an environment variable it stays as the old value until the container is restarted. Volume mount the configmap into the pod, the projected file is updated periodically. NOT realtime. Then have the app recognize if the config on disk has changed and reload